![]()
![]()
|
Tire Grooving 101 |
|
|
I have had my Swamper TSL/SX tires now for about 3 years. They have far exceeded my expectations for any offroad tire that I could imagine. They have taken me to the dunes, rocks of Arizona, cinders, and slickrock in Moab. Always providing unbelievable traction and durability. And I have never suffered a flat tire on the trail due to a carcass puncture or tear.
|
|
|
|
|
|
|
Having said that…… my tires are getting pretty worn. I got to thinking that the lugs are getting pretty wore down and can’t possibly flex and grab the rock like they used too. After lots of surfing the net and reading about tire siping and grooving, I thought I would give it a try and to improve on an already capable tire. |
|
I was looking around the garage for something to use for grooving or siping, so I could try it out on our next run to Aquila, AZ. First I tried an air powered cut off wheel to split the larger lugs of the tire. This was taking too much time, so I put a cut off wheel on my Dewalt 4.5" grinder. This worked great, but stunk and made a mess with molten rubber flying everywhere. I ended up stopping after two tires and put those on the front.
|
 |
 |
A buddy and me went in on a tire groover we got from E-bay for around $40. It had only been used once and I found out that it would not only do grooving, but siping also.
|
|
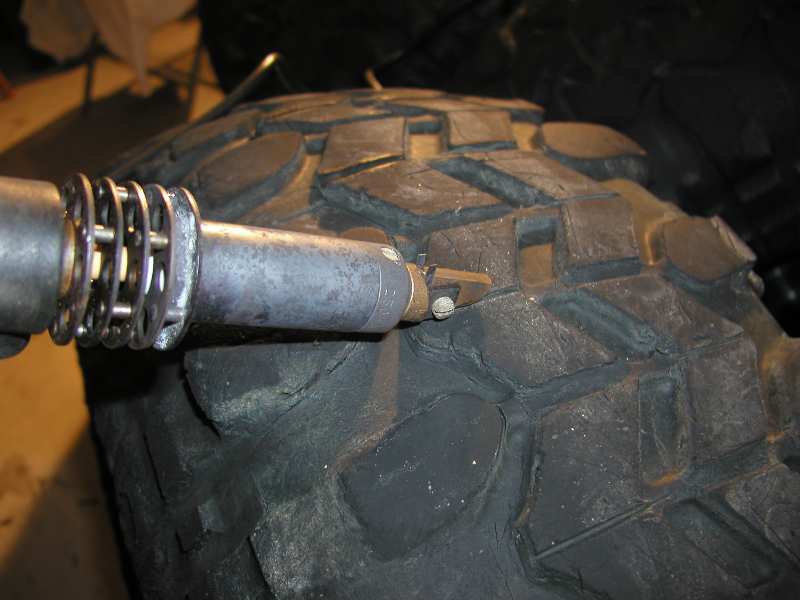
This is a picture of the tire groover, with No. 4 cutting head. You have to let the iron heat up for about 10-15 minutes before starting. The brass part of the head pre-heats the rubber so the cutting band passes through the rubber like butter. |
 |
 |
I set the cutting band to cut to the same depth of the wear bars on the Swampers. They say to go to half way of the lug tp prevent damage to the carcass and to prevent chunking of the lug. Since my tires were wore down, the wear bars were about half way. |
|
At first I was using more effort then I thought I should be. At close inspection of the cutting band I noticed the razor edge was backward. Using some needle nose plyers I swapped the cutting band around and it worked awesome. Hardly any pressure was needed to groove the lugs. |
 |
 |
I did the front tires first, re-tracing the cuts I made with the cutoff wheel, making them all the same width and depth. The tire on the left is the grooved tire. For better traction in forward or reverse, make the cuts perpendicular to the rotation of the tire. If you want better lateral traction (slidding sideways), make diagonal cuts through the lugs. Seeing how swampers already have chevron lugs, I thought I wouldn't need diagonal cuts. |
|
All four tires took me about 1.5 hours to do, that is counting the learning curve and cutting. After a while you do feel a good forearm burn!! Once the grooving was done, it was time to sipe the center lugs. Siping also makes the lugs more flexable to grip rocks, ice and snow...... soon to be snow season here!! woohoo! All I had to do was flipping the cutting head and it was ready to sipe. |
 |
 |
Try to stay off the leading edge of the lug at least 1/4-1/2" to prevent chunking. Siping is just little razor cuts in the rubber. An old dirt track, ice track, etc racer's secret! They say it will make your tires quieter, last longer and have better traction. This weekend will be my first run with the modified Swampers. I will let you know how it went!!! |
| Return to Motoman's Madness | |
